BeatStakk: The ultra-powerful pocket Groovebox to capture your inspiration...
🥁 Core Philosophy
BeatStakk was born from a simple idea: having a robust pocket beatmaker without compromising on sound quality. More than just a sample player, it's a true Sound Design tool equipped with a mixing desk and effects worthy of professional plugins.
Imagine the legendary workflow of an Akai MPC crossed with the philosophy of a Teenage Engineering PO-33, all boosted by a powerful DSP engine.
Small, elegant, and formidably effective, BeatStakk is aimed at professionals looking to capture a fleeting idea on tour, as well as passionate amateurs. Its high stability makes it a reliable instrument for Live performances, or an ideal sketching tool before a studio session thanks to its multitrack export options. Moreover, it fosters community through its ultra-light proprietary format allowing you to share your compositions with other beatmakers in one click.
🏗️ Architecture and Technical Choices
Under the hood, the fluid interface developed in Flutter drives a true processing monster.
- C++ Audio Engine (Oboe): Signal processing (DSP) is coded in native C++. Massive polyphony, SVF (State Variable Filters) with zero latency, peak limiters, and anti-click safeguards.
- Open Kit Format (
.beatstakk): You are not limited to factory sounds. The application loads external kits on the fly. A creation tool (a provided.batscript) allows any user to build their own kit in seconds from their audio files. - Ultra-Lightweight Project Format (
.bbx- BeatStakk Box): Your compositions (sequences, 12-filter settings per pad, tempo) are saved in this proprietary JSON format. It weighs a few kilobytes, allowing instant sharing via email, messaging, or Google Drive. - Studio Export (
.wav): The C++ engine allows the rendering of your loops into high-quality uncompressed WAV audio files. Whether it's the global mix or track by track.
📖 Official Tutorial
Let's discover the interface step by step, from the left to the right of the main screen.
1. Boot and Playback (Play/Power)
When launching the application, sounds are not yet loaded into RAM to save your battery.
- Press the power button. The C++ engine will extract the sounds and prepare them.
- The button then transforms into a Play/Stop button.
- At this point, you can already tap the pads to hear the raw samples, without processing.
2. Loading Kits
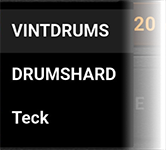
Just to the right, a drop-down menu lets you navigate through the Kits. By default, 3 factory Kits are available.
When you change a Kit, BeatStakk is smart and asks you a crucial question via a dialog box:
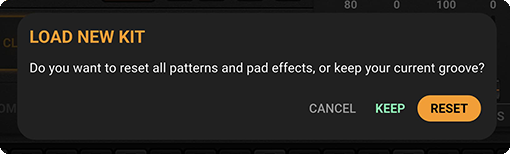
- [ KEEP ]: Keeps your rhythm (patterns) and effects, and just replaces the instruments. Perfect to test your groove with new sounds!
- [ RESET ]: Resets the application (empty patterns, effects reset) to start from a blank slate.
(Don't forget to press the Power button again to load the new kit into memory!)
3. The Tempo (BPM)
The BPM box shows the tempo of your loop. Tap the number to bring up the numeric keypad and set a new speed (between 60 and 240 BPM).
4. Import Your Own Kits (.beatstakk)
The red musical icon allows you to import external sound banks.
How to create a kit for the community?
- Gather 8
.wavfiles in a folder. - Drop in the free
BeatStakk_Kit_Maker.battool available here and on Google Drive. - Run the
.bat. It will ask for the kit name and your pad names, then automatically generate a.beatstakkfile ready to be imported into the app! For more details, see the Create Your Kit section.
5. Audio Export (WAV)
The waves icon allows you to export your current loop to audio.
- Full Mix: Tap directly to generate the global loop.
- Multitrack (Stems): If you activate the SOLO mode on a specific pad before exporting, BeatStakk will only export the audio of that pad with its effects (trailing Delay/Reverb included). Ideal for recreating the track by track in a PC/Mac sequencer (Ableton, FL Studio).
6. Manage Your Projects (.bbx)
- The Downward Arrow (Blue): Lets you load an existing
.bbxproject from your phone. The app will adjust the BPM, effects, and load the corresponding kit automatically. - The Upward Arrow (Green): Saves your current state by creating a
.bbxfile. You will be prompted to name your composition. - Files can be saved to your phone, your Drive, or shared directly via messaging.
7. Filters and Sound Design
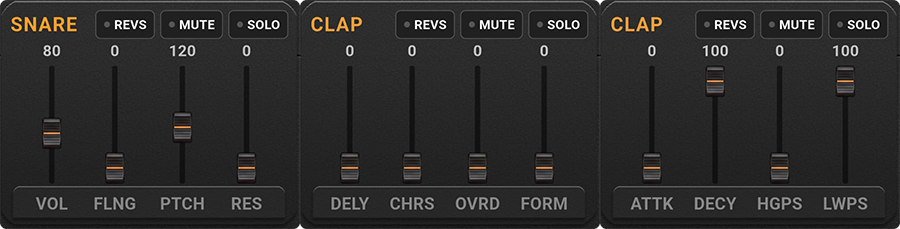
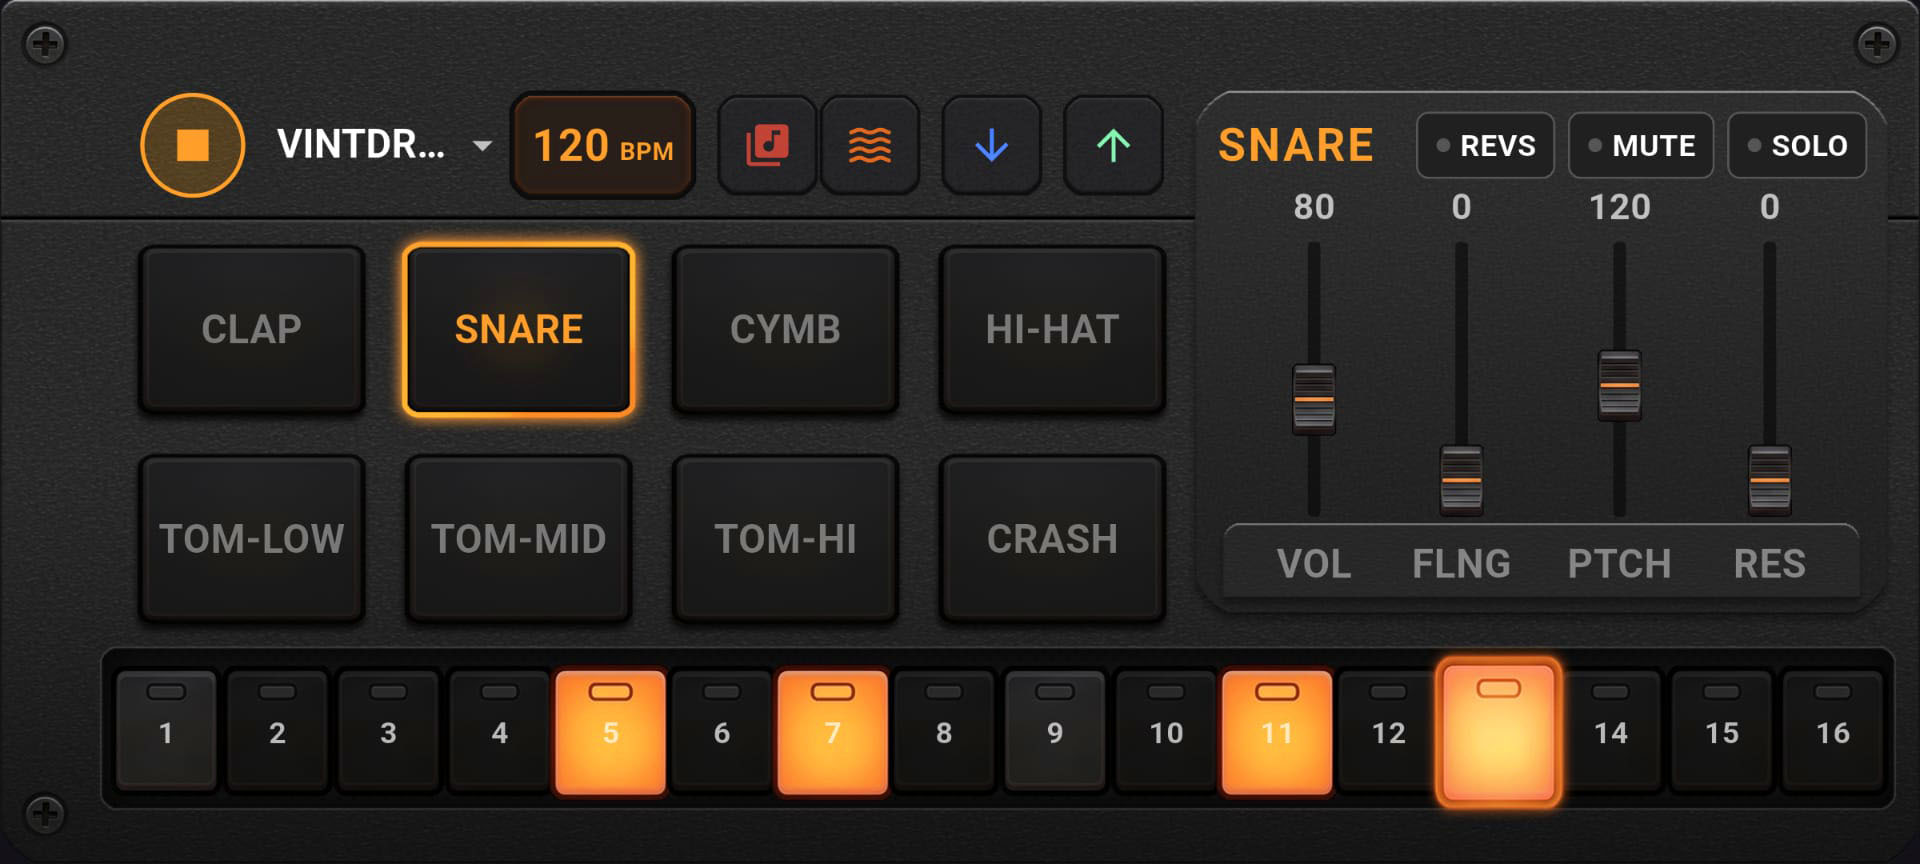
Each pad has its own sound design console strip. You can navigate between 5 control pages by discreetly tapping at the very bottom of the fader area.
PAGE 1: The Essentials
- VOL: Volume (can go up to 200% to compensate for filter gain loss).
- FLNG: Adds metallic coloration and saturation (Flanger/Disto).
- PTCH (Pitch): Speeds up or slows down the sample (Varispeed vinyl style).
- RES (Resonance): Classic resonant filter to give a "Laser" vibe to the sound.
PAGE 2: Space
- DELY (Delay): Creates a rhythmic echo.
- CHRS (Chorus): Widens the sound by duplicating it.
- OVRD (Overdrive): Warm saturation (Tape Saturation) with auto-makeup gain.
- FORM (Formant): Vocal-style filter that gives a human voice (A-E-I-O-U) to the sample.
PAGE 3: Sculpting (Envelopes and EQ)
- ATTK (Attack): Fades the sound in progressively.
- DECY (Decay): Shortens the sound to make it punchier.
- HGPS (High-Pass): Cuts the lows to keep only the "click" or the "brightness".
- LWPS (Low-Pass): Muffles the sound ("underwater" effect). The filters are secured by a natural anti-click crossfade.
PAGE 4: Mutilation & Modulation
![[Effects Ring PHSR CRSH PAN]](img/Ui_Effects_page4.png)
- RING (Ring Modulator): Multiplies the signal to create dissonant, robotic, or metallic harmonics (ideal for sci-fi sound design).
- PHSR (Phaser): 4-stage all-pass filter generating deep phase cancellation (the famous "Spaceship" sweeping effect).
- CRSH (Bitcrusher): Aggressively degrades sample resolution for a highly saturated old-school Lo-Fi render.
- PAN (Tremolo): Chops the signal volume cyclically. Pushed to the extreme, it turns a continuous sound into a "helicopter" effect.
PAGE 5: Dynamics & Compression
![[Effects PUMP SLAM CLIP OTT PNCH FAT BRIK]](img/Ui_Effects_page5.png)
- PUMP: Natural Sidechain effect that rhythmically "ducks" the volume to let the loop breathe.
- The Exclusive Compression Rack: Six destructive algorithms (only one active at a time) to pump up your samples:
- SLAM: Aggressive compression (massive ratio) to crush the sound and give it a block of maximum energy.
- CLIP: Saturated Hard Clipping that violently clips audio peaks.
- OTT: Upward compression pushed to the extreme to make reverb tails and silent details scream.
- PNCH (Punch): Dry Transient Shaper, perfect for making a kick's attack cut through the mix.
- FAT: Asymmetrical compression emulating an analog tube pushed to saturation to thicken the low end.
- BRIK (Brickwall): Pure limiter pushed by extreme input gain for a perfectly flat and monolithic result.
Performance Controls (Toggles)
- REVS: Plays the sample backwards (Reverse).
- MUTE: Mutes the pad's sound.
- SOLO: Mutes all other pads.
(Tip: These buttons are perfect for structuring your track during a Live performance!)
8. Pattern Pages (Multiple Variations)
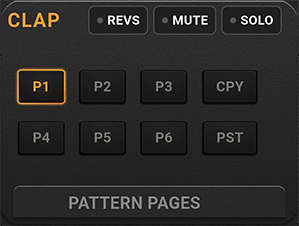
The true heart of arrangement and Live performance in BeatStakk lies in its Pattern Pages (P1 to P6) system, accessible at the end of the control panel.
- 6 Composition Pages: You are no longer limited to a single 16-step loop. You have 6 slots (P1 to P6) to create different parts of your track (Intro, Verse, Drop, Break, etc.).
- Effects Saved per Page: Each page independently saves its own rhythm grid AND its own filter and effect settings! You can have a very dry hi-hat on page P1, and that same hi-hat saturated by a Flanger and slowed down by Pitch on page P2.
- Copy / Paste (CPY / PST): Created the perfect groove on P1 and want to make a variation? Press CPY (Copy), select page P2, then press PST (Paste). The entire grid and effect settings are duplicated instantly. You can safely modify P2 without altering your original idea on P1.
The benefit of the system: This hybrid workflow offers total experimental freedom and absolute fluidity. Switching from one page to another modifies the sequence and sound design instantly, without ever interrupting or skipping the audio engine. It is the ultimate tool for building real song structures and juggling between explosive "drops" and floating "breaks" during a Live session.
9. Pads and Sequencer

- The 8 Pads trigger manual playback (Finger Drumming). Tapping a pad also selects its track.
- At the bottom, the 16 sequencer steps (Patterns) allow you to program the loop of the selected pad. The lights turn on with each pass of the playhead.
🎛️ A Classic Composition Workflow
- Choose your color: Load a Kit.
- The design: Tap the Snare pad. Lower the Decay to make it drier, add a slight Pitch and some Overdrive to make it smack.
- The Groove: Draw your notes on the 16 sequencer steps.
- The performance: Press Play. While listening to the loop run, play with the Hi-hat's Low-Pass live to create Build-ups. Play with the Mute buttons to remove the bass, then bring it back all at once (Drop).
- Save: Save your project, or export the WAV file for your friends.
🎧 Practical Example
Try it yourself!
- Download the Jungle Kit: [Drive Link to .beatstakk kit]
- Download this Demo Project: [Drive Link to .bbx project]
- Import both into the app, press Play, and observe how the filters transcend the raw sounds!
- Load DRUMSHARD and choose KEEP. Experiment with your patterns directly with another kit.
This hybrid workflow, between immediate playing and surgical design, is what makes BeatStakk unique and incredibly addictive.
🛠️ Tutorial: Create Your Own Kit with BeatStakk_Kit_Maker
This utility was designed to make your life as easy as possible. You don't need to code or even rename your files manually; the script handles all the formatting!
1. Folder Preparation
- Create a new folder on your computer.
- Place the BeatStakk_Kit_Maker.bat utility file in it.
- Add at least 8 of your own audio files in .wav format to this same folder.
- There is no need to rename them: the script will automatically copy the first 8 files found and rename them correctly in the background.
2. Launching the utility
- Simply double-click the BeatStakk_Kit_Maker.bat file to launch the console.
- The script will first check that you have the minimum of 8 required
.wavfiles.
3. Kit Configuration
- The Kit Name: The tool asks you to type a name for your kit, limited to 10 characters. Enter it and press Enter. Spaces will be automatically converted to underscores for the final file creation.
- Pad Names: For each of the 8 detected sounds, the tool asks you to enter a short name that will be displayed on the app interface.
- Type freely: the script automatically cleans quotes, replaces accented letters with standard letters, converts text to uppercase, and truncates words to a maximum of 7 characters to ensure perfect display on screen.
4. Validation and Creation
- The tool displays a clear summary of your choices (Kit name, output file name, and the list of your 8 pads).
- Type Y then press Enter to confirm the creation.
- The script then automatically generates the
metadata.jsonconfiguration file, places your audio files into a zipped archive, and instantly transforms it into a file with the .beatstakk extension.
5. Import into BeatStakk
- A success message appears confirming that your file is ready.
- Transfer this new
.beatstakkfile to your Android phone. - Open the BeatStakk app.
- Press the red Import Kit button located in the top bar.
- Select your file: the application loads it instantly and your kit is ready to be played!
⚖️ Legal Disclaimer
The BeatStakk application is provided as a virtual hardware tool.
The provided factory kits respect copyrights, but Joyxt Corp is in no way responsible for the audio files (samples) that users import, use, or distribute via the .beatstakk format.
Ensure you own the rights or authorization (Royalty-Free) for the samples you use if you plan to commercialize your exported audio tracks. Piracy of protected works is the sole responsibility of the end user.